记录一些小功能的实现
实现相机跟随
方法一
方法二
设置好距目标的距离和角度,根据数学关系计算出相机位置
1
2
3
4
5
6
7
8
9
10
11
12
13
14
15
16
float distance = 15; // 距离 float rot = 0; // 横向角度 GameObject target; // 目标物体 float roll = 30f * Mathf.PI * 2 / 360; // 纵向角度 void LateUpdate () { Vector3 targetPos = target.transform.position; Vector3 cameraPos; float d = distance * Mathf.Cos (roll); float height = distance * Mathf.Sin (roll); cameraPos.x = targetPos.x + d * Mathf.Cos (rot); cameraPos.z = targetPos.z + d * Mathf.Sin (rot); cameraPos.y = targetPos.y + height; Camera.main.transform.position = cameraPos; Camera.main.transform.LookAt (target.transform); }
相机随鼠标旋转
1
2
3
4
5
6
7
8
9
10
11
12
13
14
15
16
17
18
19
20
21
22
23
void Rotate() { float w = Input.GetAxis ("Mouse X") * rotSpeed; rot -= w; } void Roll() { float w = Input.GetAxis ("Mouse Y") * rollSpeed * 0.5f; roll -= w; if (roll > maxRoll) { roll = maxRoll; } if (roll < minRoll) { roll = minRoll; } } void LateUpdate () { Rotate(); Roll(); .... }
拖动图标在场景生成物体 拖动UI
新建Drag类,继承IBeginDragHandler, IDragHandler, IEndDragHandler,实现拖动UI功能有三个接口:
public void OnBeginDrag (PointerEventData eventData)public void OnDrag (PointerEventData eventData)public void OnEndDrag (PointerEventData eventData)
在Drag类里实现这三个接口即可实现想要的拖动效果,最后不用忘了把Drag脚本添加到想要被拖动的UI物体上。
在场景中生成物体
要实现这个功能:
首先在OnBeginDrag中生成新的GameObject;
然后在OnDrag中,根据鼠标在场景里的位置调整GameObject的位置,再检测GameObject的collider有无和其他物体碰撞;
最后在OnEndDrag中,如果GameObject的最终位置合法,则不再移动;否则销毁物体,生成失败。
技能冷却效果 定时器
实现冷却效果计时器必不可少,实现方法也很简单,只需两个变量:
1
2
bool timerStarted = false; float remain = 10f;
然后在Update中作如下更新:
1
2
3
4
5
6
7
8
9
10
void Update () { ... if (timerStarted) { remain -= Time.deltaTime; if (remain <= 0) { CloseTimer(); } } }
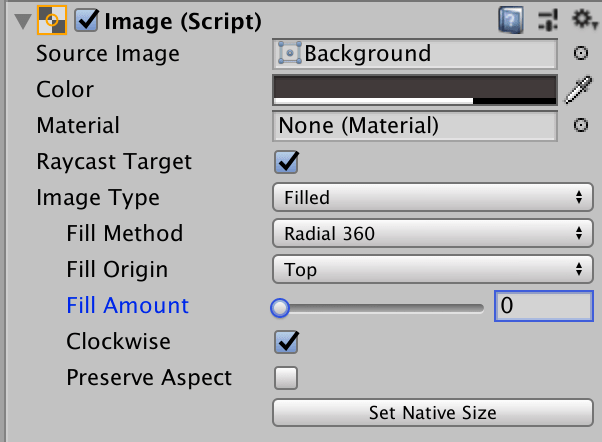
UI效果
Button的层次如下:
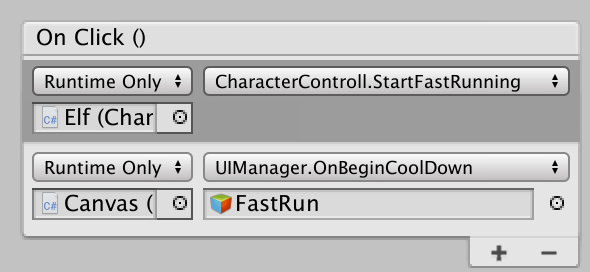
Note :在开始冷却的同时,应把设置btn.interactable = false;,否则按钮可以在冷却过程中再次被点击。
这里Button的OnClick绑定了两个函数,分别给CharacterController实现技能效果,和给UIManager实现UI动效:
鼠标点击选中场景中的物体 思路:从点击位置向场景发射射线,检测是否击中物体
实现:
1
2
3
4
5
6
7
8
9
10
11
12
13
14
void MousePick () { if (Input.GetMouseButtonUp (0)) { // 发射射线 Ray myRay = Camera.main.ScreenPointToRay (Input.mousePosition); // 选择想被选中的layer int layerMask = LayerMask.GetMask ("Building"); // 检测碰撞 RaycastHit2D hit = Physics2D.Raycast (new Vector2 (myRay.origin.x, myRay.origin.y), Vector2.down, Mathf.Infinity, layerMask); if (hit.collider) { // 检测到碰撞,选中该物体 } } }
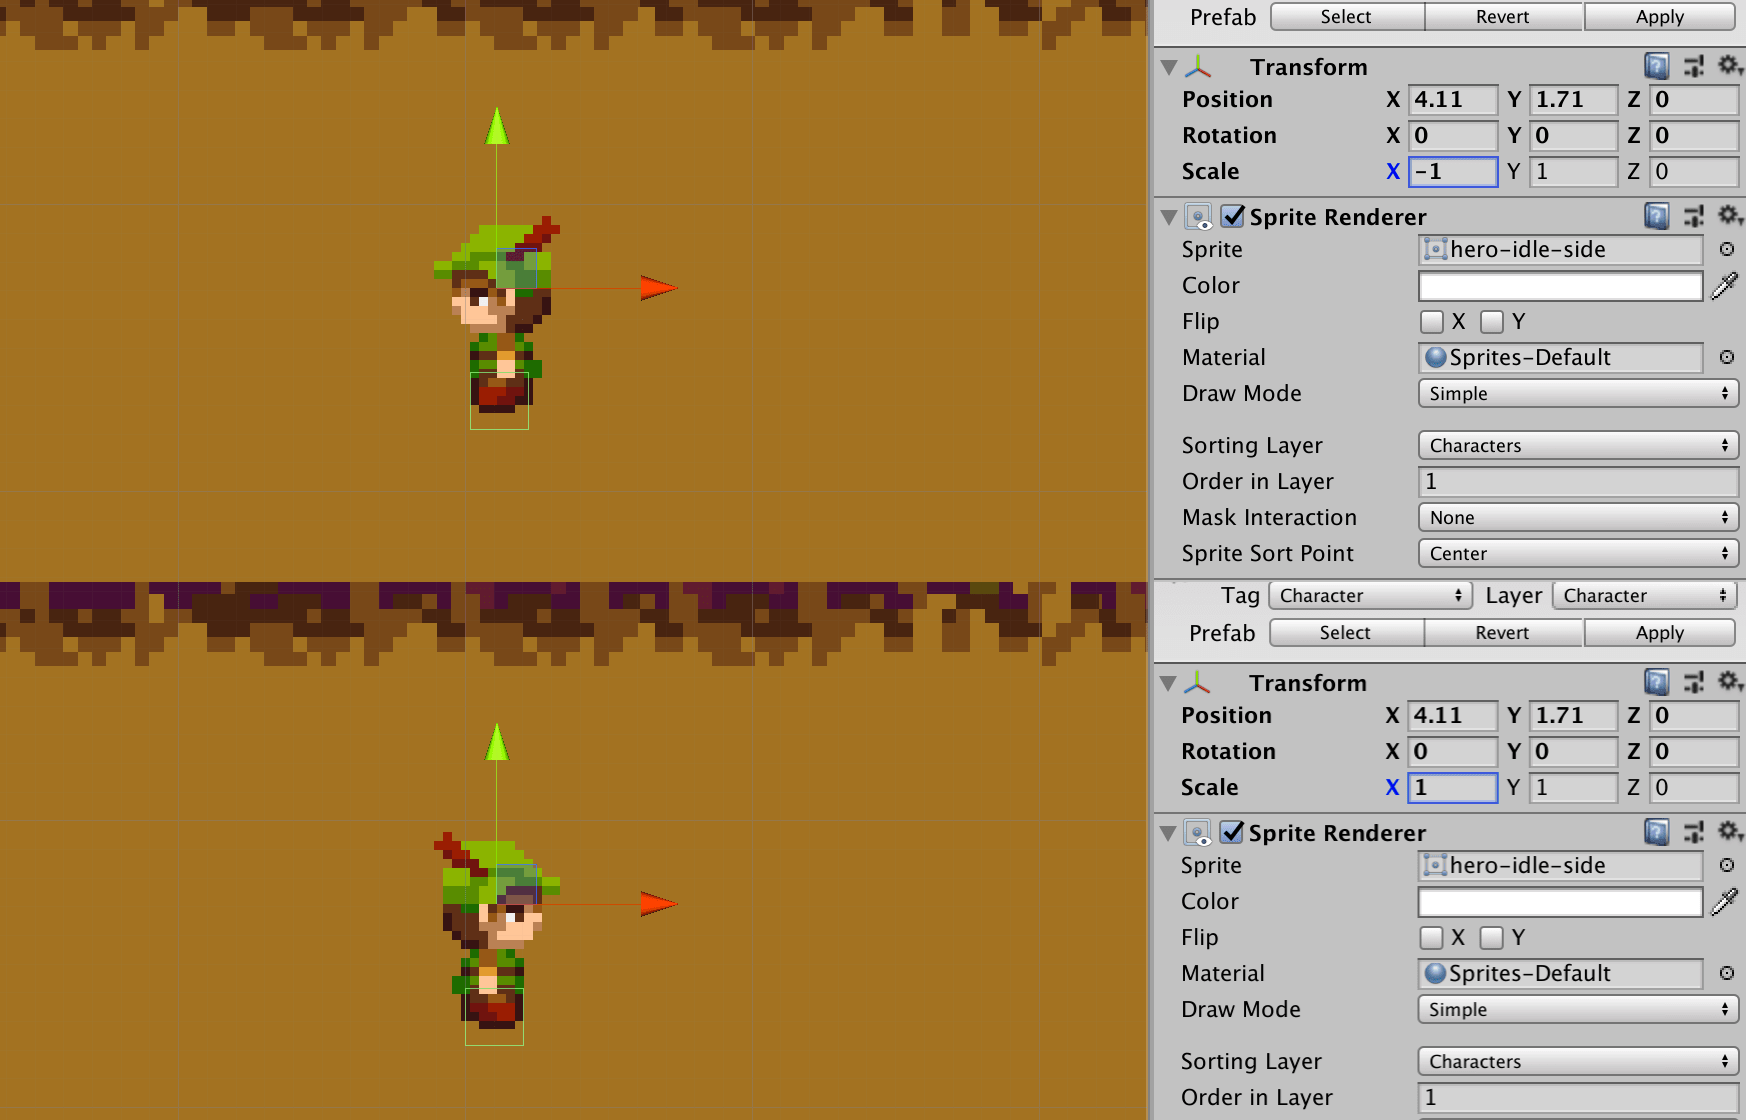
2D人物朝左朝右 思路:如果原sprite朝右,那么只要把transform的scale.x变成-1就是朝左了。
实现:
1
2
3
4
5
6
7
8
9
10
11
12
13
14
15
16
17
18
19
void LateUpdate () { Vector3 localScale = _transform.localScale; if (_vx > 0) { // moving right so face right _facingRight = true; } else if (_vx < 0) { // moving left so face left _facingRight = false; } // check to see if scale x is right for the player // if not, multiple by -1 which is an easy way to flip a sprite if ((_facingRight) && (localScale.x < 0) || ((localScale.x > 0)) { localScale.x *= -1; } // update the scale _transform.localScale = localScale; }
未完待续